I don't get
many emails from fellow pen turners and when I do, the topic is
generally CA glue finishes, poor assembly instructions or
turning pens from spalted woods.
I had a request for some cigar pens a while ago
and it provided the opportunity to expand on all three in considerable detail so here goes: |
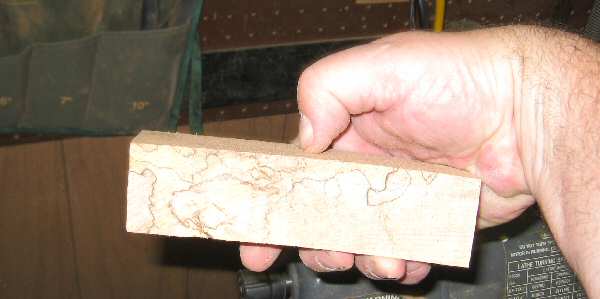 |
Check
spalted wood for too much pith. I do this by seeing if my thumb
nail and a little pressure leaves an impression.
If it does, the
wood is too rotted and unless you like draining CA glue into bottomless
pith, contact the seller and get a rebate. |
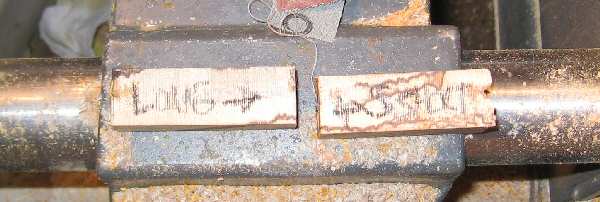 |
This
may seem like plain common sense but when you are preparing a number of
blanks at the same time, mark the blanks as you go and indicate the
direction they should be mounted. With Cigar Pens, one piece is 1/4" or so longer
and if you don't trim the blanks after milling the ends, it is
hard to tell which is which.
Don't end up with a pile of cut and
milled blanks with no directional markers or indication of who
belongs to who and figure you will get the labeling right the first
time. |
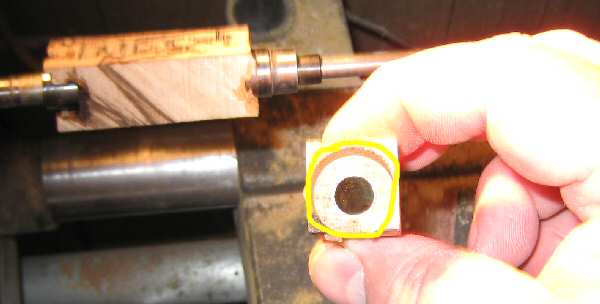 |
Milling
the ends of spalted wood blanks should be done in a couple steps.
Mill down to 1/8" or so above flush. Stop and apply thin
CA glue to the ends and let dry. This stabilizes the ends and
helps ensure you don't end up tearing out chunks during the milling
process.
Remember, this is partially decomposed wood you are dealing
with. Use light pressure and patience to get down to brass.
Apply another then coat of CA glue to the ends after milling is complete. |
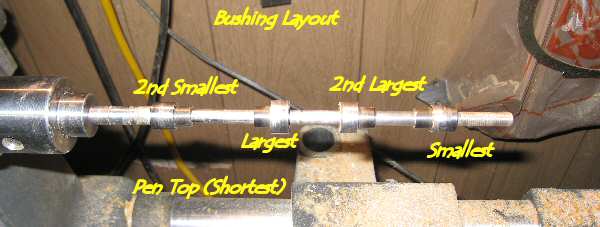 |
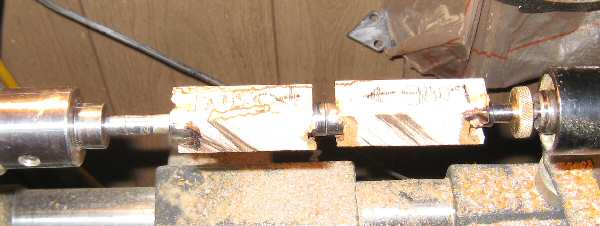
| This
is the bushing layout for mounting from left to right, pen top to pen
bottom. It would be nice if the pen manufacturers,
WoodCraft in particular, provided better graphical instructions. |
 |
| It sure is nice to have blanks with directional arrows indicating what goes where, isn't it. |
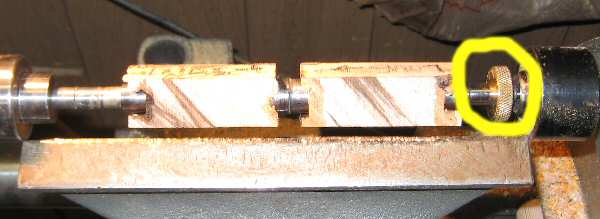 |
And
while I am thinking about it, there is a downside to these large brass
nuts and turning at high rates of speed. These nuts can tighten
while turning, bending the shaft enough to give you a slightly oval
pen. Check this periodically and ensure it is not over-tight.
I have had to use vice grips on more than one occasion to loosen it up. |
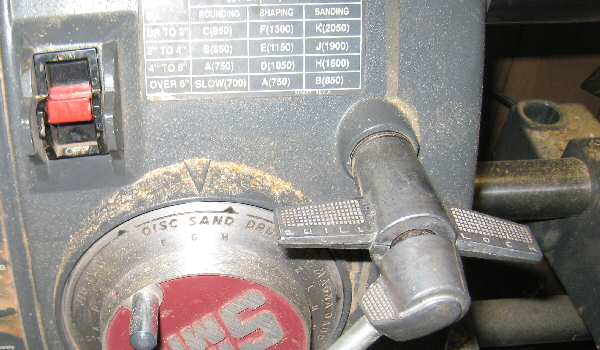 |
| Everyone
has their preferences, and mine is somewhere around 1300 - 1500 rpm.
For these larger pens, I find starting at one speed and keeping
it there throughout the turning process yields the best results.
My theory is that working at a constant speed keeps the balance and
center of gravity constant so if your blanks are drilled more or less
on center and their weights are similar, there shouldn't be any problems. |
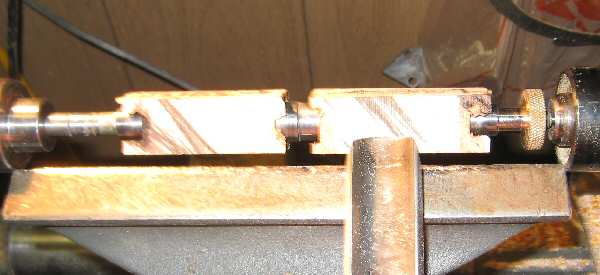 |
My
absolute favorite tool of all time is the large gouge included with the
ShopSmith for this kind of work.
While the metal is not of the
best quality and requires frequent sharpening, the width and pitch
of the tool is.
You can pick these up at very reasonable prices
from E-Bay or similar sites.
I set the tool rest a bit
higher than what is normally recommended and angling down. This
aids in not getting too aggressive when turning. |
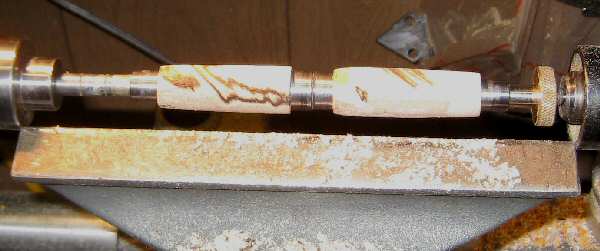 |
Turn the blanks evenly, gradually sloping the blanks down to the bushings. When you get within an 1/8" or so.........
STOP
Remember we are talking about turning pens from spalted woods here. Spalted woods are varying degrees of stable.
Apply thin CA glue at least to all 4 ends if there is any doubt at all about the softness of the wood.
As
a test, apply one drop of thin CA glue onto a suspect end. If it
vanishes within the blank, coat the entire blank and let it dry.
This is not so much of an issue when turning larger pens (Cigar Pens come to mind) because there is more wood mass.
It is a huge issue with 7mm pens because there is so little wood in the end product.
#1 Rule in turning pens from spalted woods : If in doubt, use more CA glue.
|
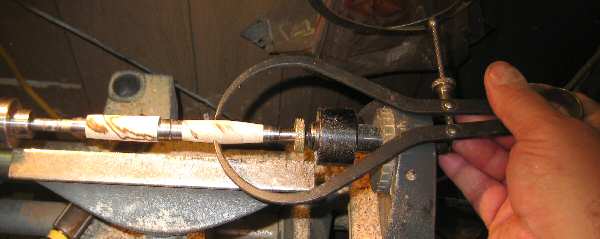 |
| I prefer to finish turning the cigar pen bottom first, and I then get a width measurement so the pen top will match. |
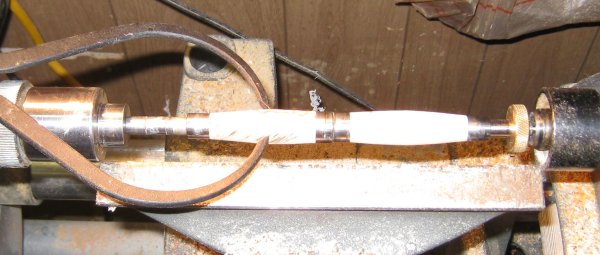 |
| Boy, how is that for over exposed. Anyway, the widest Cigar Pen diameters now match. |
 |
Thank
God for Fall. The temperatures are bearable.
The
end quality of the CA glue finish is in direct proportion to the
quality of the sanding job.
This is particularly true when turning spalted woods.
|
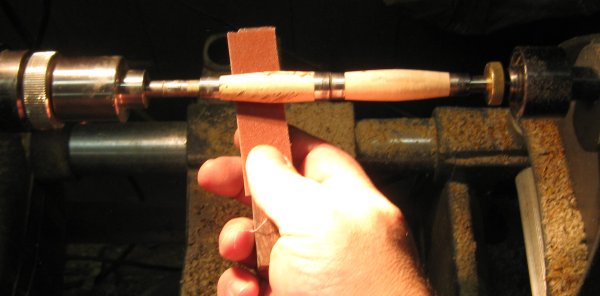 |
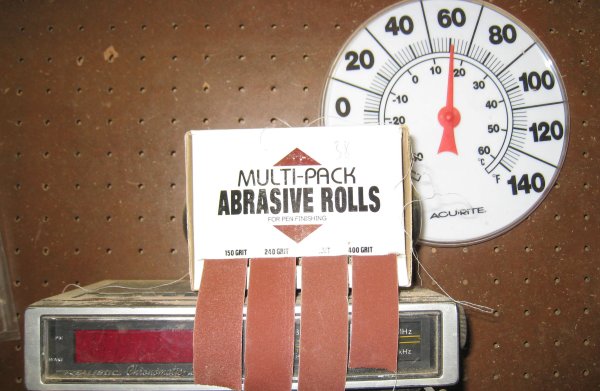
Boy,
my exposure settings are all over the place tonight. Start
sanding with 150 grit and use a backing board. A spare pen blank works
well. Continue sanding until the divots, humps and other imperfections
are removed. You should feel a nice, smooth surface when done.
Sand one more time with 150 grit freehand (no board). |
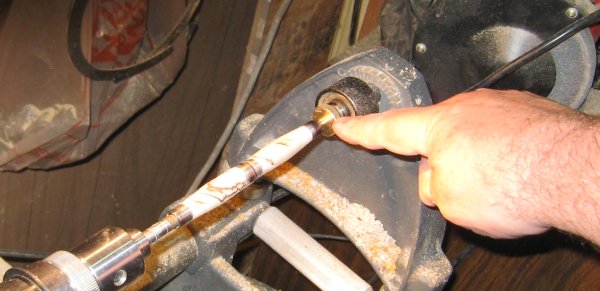 |
Oops,
almost forgot.
Check the tightness of the nut again and ensure it
has not got too tight, warping the shaft. It is not too late to
correct an oval pen. |
 |
Continue
sanding up to 400 grit. Stop the lathe and hand sand with 400
grit going with the grain (end to end).
All imperfections should
now be sanded out.
Start the lathe again and sand with 600 grit
paper. Stop the lathe and hand sand with 600 grit.
I normally go
to 400 grit but those CA glue finishes require at least 600, and we are
going a bit further than that. |
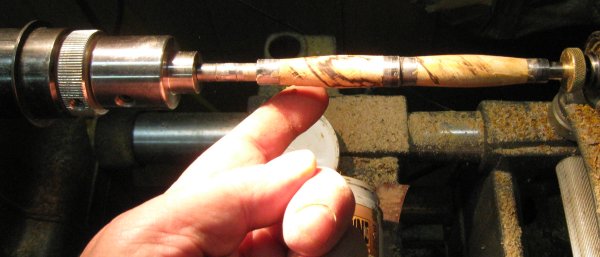 |
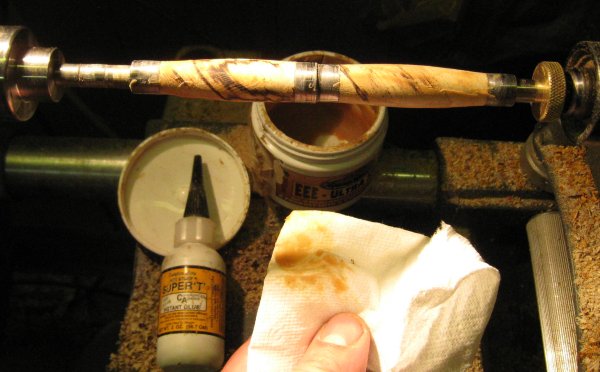
| Clean the Cigar Pen blanks and apply a thin coat of EEE to both blanks. EEE gets you to somewhere around 1500 grit. |
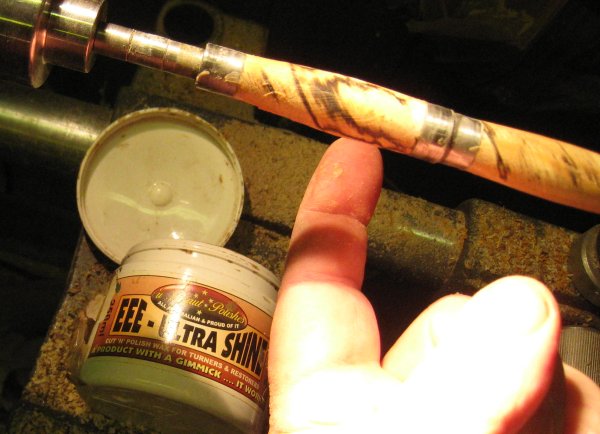 |
| One
container of EEE goes a long ways. This one is over three
years old and will have to finally be replaced this winter. |
 |
I
probably need to digress here a minute. This is not a true CA
glue finish. I don't like true CA glue finishes because they look
too fake and plasticky to me. The method shown here is my own
personal hybrid creation. I think the finish looks much more
'real' and it also adds durability to the cigar pen blanks.
On with the show:
Rub
a thin layer of EEE into a clean paper towel. The idea is
to protect the paper towel from the CA glue, which is going on next.
|
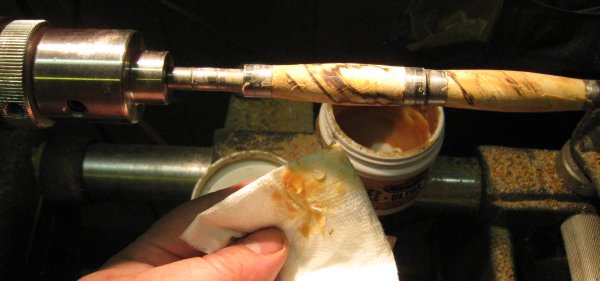 |
Put
two drops of medium viscosity CA glue on the EEE (if you look
closely, you should see two drops of CA glue atop the EEE on the
towel).This is
for the pen top.
Start the lathe and coat the pen top working
from end as far as you can go with the first drop, using as little CA
glue as possible.
If you run out of glue, use the second drop.
You want to get all the glue on in short order. |
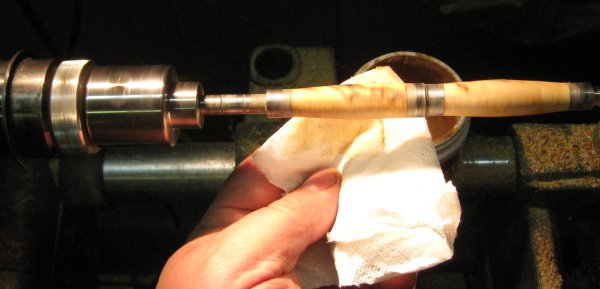 |
After
the blank is coated, begin rubbing the glue / EEE mix in slowly,
working back and forth. The finish will begin to wax up as heat
and light pressure is applied, and then it will start clearing.
When the finish looks like it is worked in switch to a
clean portion of the paper towel and use more pressure to generate
heat, removing all excess glue and wax.
It is also a good time to
remove any excess from the bushings. You will know when to stop
- the surface will start shining. Repeat the process
with the pen bottom.
Don't try doing both sides at once. It rarely works. |
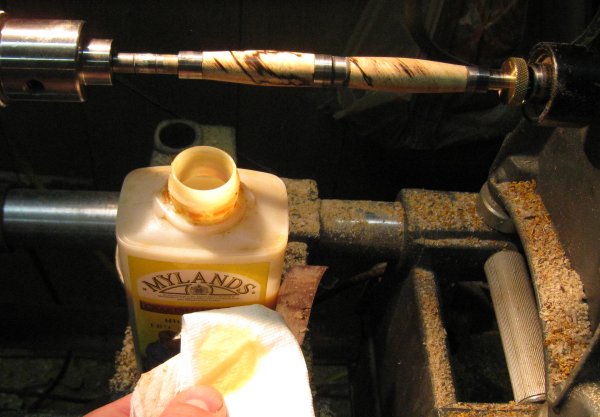 |
Pour
a liberal amount of Mylands on a paper towel by pressing the towel over
the open bottle and turning it upside down for a second.
Work the
polish into both blanks at the same time, slowly building a couple
layers while alternating back and forth between the blanks.
Remember,
this is a friction polish so pressure and heat is a requirement. |
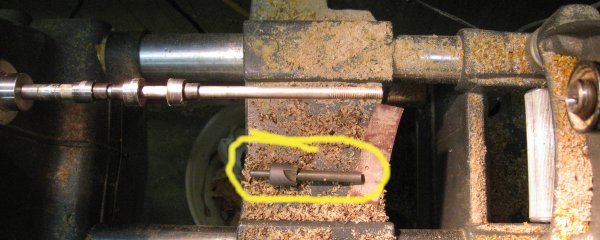 |
| Remove the blanks and clean the ends up using the milling tool. |
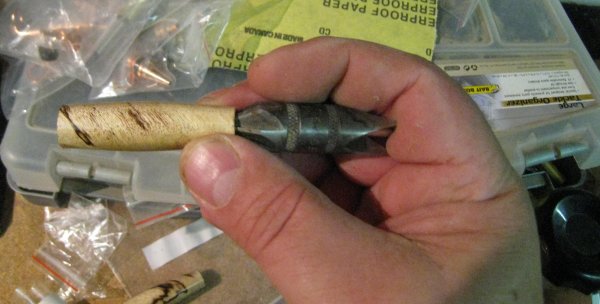 |
| Take a little extra time and chamfer the pen blank ends. Makes life a lot easier during assembly. |
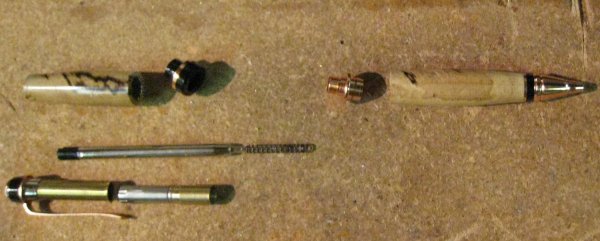 |
Lay
out the pieces in the order which they will be assembled. Press
the nib in as one piece. Same for the pen clip. Assemble
these parts before hand if they are shipped loose. Does wonders
for assembly.
WoodTurningZ.com is rapidly becoming my supplier
of choice. Their prices are hard to beat and the quality is the
same as the more expensive items offered by competitors. They
also buy up discontinued kits from Pen State Industries and offer them
at very nice prices.
Their CA glue is at least half the price
of what you normally see. It is a different brand but I suspect
it will work about the same.
If you feel like experimenting with
the polymer / plastic pen blanks but blanch at the price for nice ones,
check these guys out.
They also have discontinued blanks. |
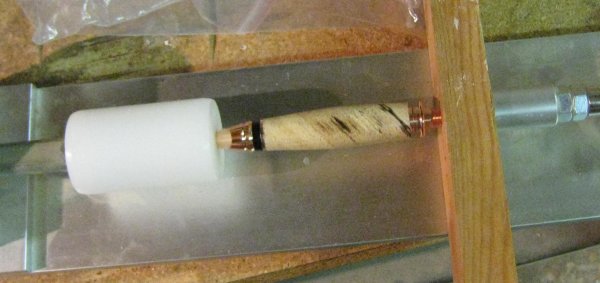 |
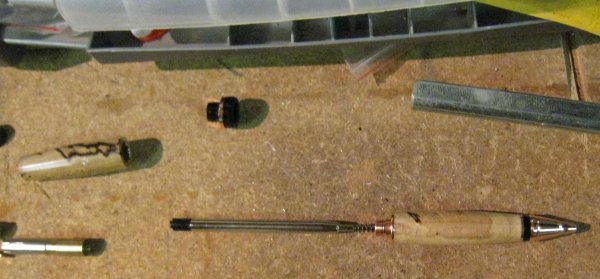
Press
in the pen nib first and then press in the threaded bit. The
instructions call for cutting a block of wood for pressing using the
shoulder, rather than pressing on the threads. This can be bypassed if
one uses the chamfering tool and a block of wood.
Haven't damaged any threads yet.
|
 |
| Insert the spring, ink refill and screw the twisting mechanism into position. |
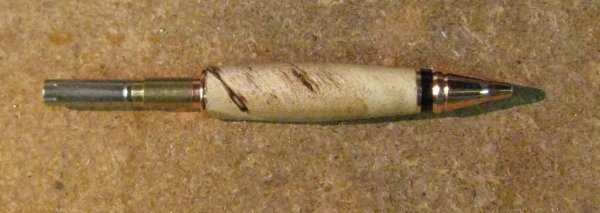 |
| The bottom should look something like this. |
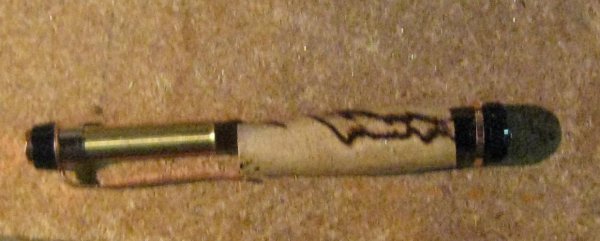 |
Pen
top: press in the bottom piece first. Don't forget the
brass washer. Press the pen top in as one piece.
The pen clip can hide minor flaws so it pays to have a close look at the finish before pressing the clip into place. |
 |
Assemble the two halves and viola! A spalted maple pen with a CA glue finish which still looks natural.
Other Cigar Pens: |
 |
| Osage Orange (Hedge Apple) is a dream to turn and makes for some very attractive pens. |
 |
I
am not sure what this wood is but I think it is spalted white
oak.
I dug a log out of a trash pile a couple years ago and got
some nice pieces. |
 |
| Brown Mallee - as fun to turn as usual. |
 |
| Red Mallee - one of the woods CA glue finishes were made for. |
 |
A
Cross-Cut Cigar Pen. These other pens took about 40 minutes a
piece. This cross-cut pen took over two hours.
There is nothing quite like them but you have to have patience and really sharp tools to have any kind of success.
If I am down close and the chances of the final turning busting out all over the place look pretty high,
I am not above sanding these down to size.
What makes it all worth it is the completed project.
There
is something about cross-cut woods and the way light refracts off them
when sanded and polished to a high degree of perfection.
It can be almost magical. The picture doesn't do it justice. |
 |
| Hedge Apple with a little sap wood. This turned out really nice. |
 |
| My
first acrylic cigar pen. This one is called 'Molten Metal.'
No CA glue finishes required. I've made a few of these
acrylic pens and my success rate is not good. I think perhaps I
need to actually sit down and read some instructions. |
 |
| And Last but not least, a Banksia Pod Cigar Pen. I will have to write up something on this one. |
Anyway, I hope you enjoyed the show.
Bullet Points for turning pens from spalted wood and employing CA glue finishes:
1. If in doubt, use more CA glue.
2. If you are still in doubt, refer to Bullet Point #1.
3.
Test spalted wood for softness before doing any turning. If
you really like the piece and it is soft, refer to Bullet Point #1
4. Ensure you have enough CA glue on hand to complete the project.
5. Turning at constant speeds helps.
6. The better the sanding job, the better the CA glue finish.
7.
CA glue darkens wood. Try shopping for woods very light in
color with very dark spalting. Spalted maple for this reason, is
a favorite. |


