Updated 08-2013, 03-2014, 09,2015
So what happens when your living quarters change and you no longer have access to the usual wood turning tools.....
Well, one would either hang up the hobby for the duration or.......consider a workaround.
Is it possible to set up a lathe in a one-bedroom apartment?
What about dust collection, chips flying all over the place, noise and tool grinding?
After thinking on this for the better part of six months and getting surprised by not getting gouged more than I usually am by the IRS, I figured I had the resources to go ahead and give it a try.
Lathe Selection
Lathe selection of course, is going to dictate much of what you can and cannot do, and what your really need to do.
I was looking for a lathe of decent quality with a dedicated stand that was small and portable with a reasonable selection of speeds.
I also wanted to be able to lock the headstock and an easy way to get that is to look for a lathe with an indexing head.
The ability to turn bowls 8" or a little more would also be desirable.
Reasonable quality for a decent price
So after six months what did I come up with - drum roll please..............

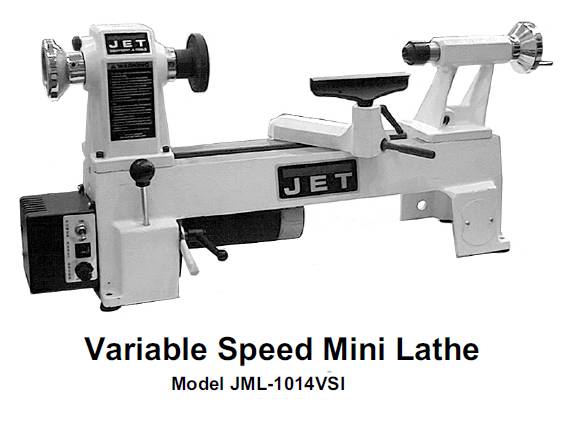
This Jet Mini Lathe weighs about 80 pounds and a dedicated stand can be purchased separately.
It sports a 1/2 horsepower motor, has variable speed control and has indexing so the headstock can be locked.
and.....they just happened to have one at Woodcraft. Not only that but they had the stand as well.
Here is a PDF Instruction Manual with the particulars.

The boxes I could manage fine by myself. I was surprised at how much the box with the stand weighed.
I also picked up a keyless chuck and a pen mandrel at the same time.

I can now see why the stand is so heavy.
The stands are 1/8" tube steel and the cross-piece is 1/4".
Lathe Selection

The pieces are easy enough to assemble. The cross-piece is threaded for bolts and the height is somewhat adjustable.
The feet will give you an extra inch or so of height.

The stand takes about 30 minutes to assemble. The lathe mounting plates can provide another two inches or so of additional height, should you need it.

The lathe itself requires virtually no assembly. Simply lift it out of the box and bolt it to the stand.
The variable speed control does need to be mounted on the side and its power cord clipped in place.
So far so good.
I set the lathe to the slowest speed and started it up and couldn't believe how quiet it was.
If one had some hearing loss, they probably wouldn't even hear it. This is much better than I expected.

I need a plastic mat or something to put under the lathe and something for dust collection.
Dust Collection - Updated 10,2015
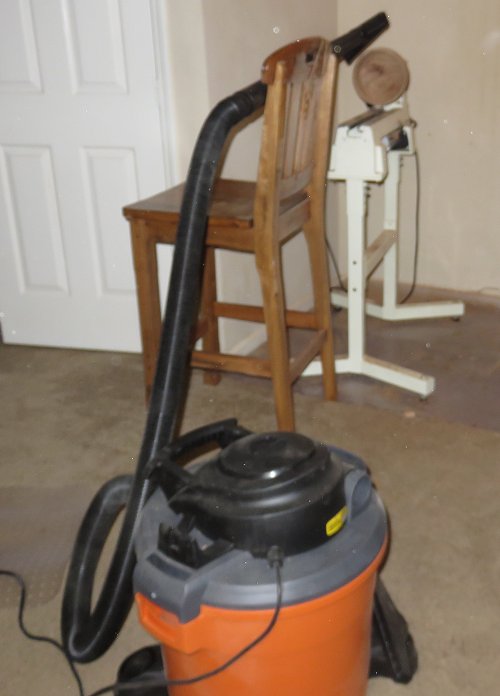
I found this on sale at Walmart for $30.00 - a 5 gallon Shop Vac.

This should work just fine.
2015 Update

The preceding setup did not work just fine.
Turns out the ShopVac has a nasty habit of blowing dust out the exhaust. A wet rag took care of the problem.
A heavy duty plastic floor mat works much better for catching chips and makes cleanup much quicker.
10-2015

The addition of a real ShopVac, in this case one manufactured by Rigid, made a tremendous difference in dust collection. Cost as around $80.00, about the same as the band saw.
I wouldn't cheap out on dust collection again, if I was just getting started.
Tools
Turning tools I thought would be a problem because I didn't want to spend the $$ for a grinder or use more space.
For the past several years I'd heard about carbide-tipped tools - tools that never needed sharpening.
Knowing nothing about them, I went back to Woodcraft and asked a couple turners for opinions.
There opinions were almost too positive to be true and.....the tools were expensive.

I opted for an 'Easy Finisher' from 'Easy Wood Tools.' Even made in America - how about that.

The theory behind this is that once an edge becomes dull, you rotate the cutting disk and viola! It is sharp again.
This 'Easy Finisher' is the smallest they have and still it cost @ $60.00. The carbide discs aren't cheap to replace either. They are somewhere around $18-22.00.
2014 Update on Carbide Discs
Forget going to Woodcraft or Ebay for these discs.


Go to AZ Carbide
They have very good deals on cutting discs and don't overcharge on shipping.
Test Subject #1

I have a bunch of these Myrtlewood bowl blanks. They are fairly light and soft, and should do for the experiment.

This myrtlewood blank is glued on the usual 2x4 sacrificial block.

I started up the dust collector and the lathe. No vibration at all.
The easy finisher is rapidly cutting into the bowl blank.

It takes no more than a minute to turn the blank round. I am impressed!

The dust collector works.....sort of........

It picked up quite a bit. The chips that dropped for the most part landed on the cardboard and stayed contained on it.
I can live with that. After all, the dust collector is a Shop Vac.

I am most curious as to how the 'Easy Finisher' will work for hogging out the inside.

Ummm.......it works really well!
I was initially having a bit of trouble with the tool catching and wasn't sure what was going on so I did what anyone
else would do and found a UTube video.
Turns out the tool needs to be kept parallel to the ground while turning. You go at it straight on.
As long as I kept the tool flat, I went around those inside curves as easy as you please.
If I started angling the tool up, it started to catch and I got tear out..

All in all I've spent maybe 15 minutes on this and have had incredibly good results with this 'Easy Finisher.'
I would say I could start light sanding with 220 or 320 grit and be happy with the results. The finish is that smooth.

Here is a close up of my first time out of the chute with this new lathe and the new tool.
Still have some more work to do but I am going to have a fun time doing it in the comfort of HVAC!

I like this picture. How's that for dust collecting creativity.

I'm cutting grooves in the bottom of the bowl to catch condensation coming off of a glass of water
so the inside of this is going to be left fairly rough.

That doesn't look bad and takes no time at all. Myrtlewood is fairly soft.

That's what I had in mind.

Finish with a coat of Tung Oil.

Off the lathe, almost finished and no sanding was performed. Not bad!

Still need a new set of Cole Jaws
Test Subject #2

This time around I'll try something wider - 100+ year old barn wood from St. Joseph, MO.

I have an assortment of templates...

In lieu of a band saw, this should work ok.
August 2013 Update:

The jigsaw ended up being a bit too unstable, only marginally safe and rather noisy.
This cheapo Scroll Saw from Ryobi and available just about everywhere, is a much better, quieter and safer option.
March, 2014 Update:

After running into this problem one too many times, I decided it was time to upgrade.

For what I wanted to do, it seemed a band saw was a much better alternative to the scroll saw.
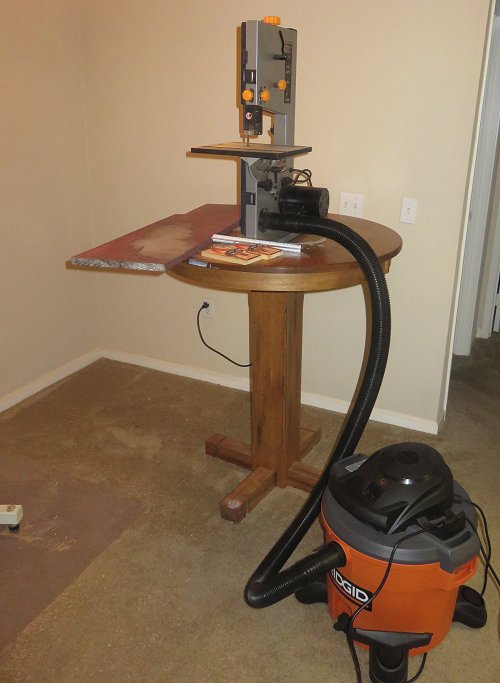
I read the reviews on Amazon, Home Depot and Lowes, and kept circling back to this Ryobi 9" band saw. It was certainly within my price range and it is amazing how much you can pay for one of these saws.

The saw weighs around 40 pounds and comes with a 1/4" saw blade, which was shipped loose.
It only took 15 minutes or so to true the blade, install the table and drill a couple holes for mounting bolts.
October, 2015 Update

Another advantage of a real ShopVac is it practically eliminates dust from the band saw.

I tested the saw on a piece of 3.5" buckeye. It performed admirably.
Smooth operating and very little noise with no vibration.
There is a port for a Shop Smith attachment. Unfortunately, my 5 gallon model is a tad under-sized.
If I added the cost of the initial jig saw and the scroll saw, it would have about covered the cost of this band saw which with taxes, was about $130.00.
It does come with a miter gage but not a rip fence which is not a deal breaker for me - after market rip fences are available, or you can make your own.
Test Subject #2 - Back to the Lathe

Looks close enough to center to me.

Baking the piece in the oven at 220 Degrees does speed up the glue trying process.
Test Subject #1

Need to readjust the dust collector.

I think this barn wood is pine, and the new tool goes through it like a hot knife through butter.

Squaring up the backside takes under a minute. I timed it.

I think I'll put a wide rim on this plate.

Contouring the back takes only a couple minutes. This is looking nice.

Several minutes late, the piece is finished. The surface is so smooth, I could probably start with 320 grit sandpaper.

Tung oil does a fine job bringing out the remaining patina.

In order to do a nice job finishing the bottom, I need a chuck and a set of Cole Jaws.
This is a smaller Barracuda Chuck. These came from PSI Woodworking and are the 'C' size.

The Cole Jaws are solid steel and are well machined.

This tightening system is new to me.
Instead of the usual T-handle, this chuck uses two bars.
Seems to work ok though.

Huh...these expand further than I thought. At first glance, the Cole Jaw set appeared to be too small.

There are two sets of nibs included, one for short and one for higher profile turnings.

A different way of tightening a chuck, that's for sure.

This shouldn't take any time. This wood is very soft.

This takes all of about 5 minutes.

The finished product looks very nice. Light as a feather too.
Test Subject #3

How about a nice, hard piece of off-balanced hedge apple?

This is going to require a belt change. The slowest speed is 500 rpm. Changing the pulley doesn't take long.

The carbide-tipped tool is still working well. However, the glue needs to dry a bit more.

Total time involved so far: Seven Minutes. .

At 15 minutes, the hedge apple blank is reasonably round and flat.
The lathe handled the off-balance piece well. I am sure the heavy duty stand helped.
There was no noticeable vibration.
I think I could have made faster progress with the 'Easy Rougher', which I don't have.
Probably should get the full-sized one.

At 30 minutes the piece is almost round.
The 'Easy Finisher' is significantly shortening typical turning time for me.

35 minutes has me about 1 1/2" into the bowl interior. I am impressed.

I'm about done with this but do need to add a little crack control just in case.
A good way to do that is to cut a groove with the parting tool an add some inlay.

To remove the piece from the lathe, you simply unscrew it. I like that.

In this case, I think I will use Inlace. I've used it before and it does a nice job.
Maybe throw in a few gold nuggets as well.
One thing nice about this resin is that it doesn't dull the tool (which still hasn't dulled yet) and it is easy to sand.
Add hardener, stir well and pour.

Ensure the groove is over-filled. The inlay hardens fairly quickly so it is easy to mound up.

This looks fine. Just need to let it harden.

The smell given off from fresh inlace is substantial so it is best to set the piece outside for a while.

Hedge Apple bowl with turquoise inlace inlay and a True Oil finish.
Test Subject #4

Last but not least, it is time to try turning a pen. The jaws seen here are specifically designed for holding pen blanks.
This pen blank is from an experiment in spalting maple. It is fairly hard but needs to be cut down to size.
A parting tool in lieu of a band saw ought to work just fine.

Yes, this will work.

One thing about these jaws is that they only use one screw. Given my druthers, I'd rather have two.
Seems to be working ok, though.
March 2014 Update:

I abandoned the preceding pen blank jaws after bending too many machine screws in favor of this dedicated pen blank / bottle stopper chuck from Pen State Industries.

You can buy this chuck in two sizes, a smaller size for pen blanks ($30.00) only or a larger size which will handles bottle stopper blanks and smaller ($@60.00). I would recommend going with the larger size unless all one wishes do do is drill pen blanks.
This dedicated chuck is much better at drilling blanks which aren't perfectly shaped - deer antler comes to mind. I had a few of them fly off the lathe and broke a drill bit as well using the first set of jaws.

For this experiment, I decided to go with a standard 7mm pen kit.

Drilling with the lathe is a bit different....the blank spins and the drill is stationary.

The drill bit advances by turning the back knob on the tail stock.
Drilling more than 2" requires moving the tail stock forward, retracting the drill and then repeating the process.
This is a keyless chuck from Wood River . No key means one less piece to eventually misplace.

Another plug for Stick Fast from Woodturningz.com. Works well and is reasonably priced.

A knockout rod is provided with the Jet Mini-Lathe to remove attachments. Inserts require a #2 Morse Taper.
In this case, the drill chuck needs to be moved to the headstock.

Have to have a pen mill, so I opted for a brand made in the USA, which is unusual anymore.

The first thing I ended up having to to do was sharpen the pen mill. It was rather dull.
Milling the ends went well after that.

This is what I have been needing for a while for turning pens. It was not that expensive either.

Here is the completed set up. Looks remarkedly like the old setup. We'll see how the 'Easy Finisher' does.
So far I have turned two bowls and a plate. The tool is still sharp.

Turning goes quickly, however lighting is a bit of a problem.

I found this on a trip to Walmart. This looks exactly like what I have been needing for a while.

This little LED bulb really throws some light. This will work well!

The 'Easy Finisher' provided a finish that is going to take very little sanding. I am impressed.

The finished pen blank pieces look pretty nice.

Although not absolutely necessary, a pen press is nice to have.
There have been big advances in pen presses over the last ten years.

You can press pieces together using the lever on the left or the screw on the right.
The screw on the right works well for fine tuning.


Pen Assortment - Plastic, Acrylester, Mica Pearl, Barn wood, Spalted Maple, Red Mallee, Deer Antler, Cedar........
Looks like I'm back in business!
Closing Comments:
I wouldn't go much larger than a mini-lathe for your average one-bedroom apartment.
Using a ShopVac for dust collection works well enough for smaller items. Larger bowls and the like can be more problematic.

Using the Easy Tools brand is the way to go in the future. For most jobs, all one needs is an Easy Rougher, Easy Finisher and a parting tool. These tools are the C3 (or smallest) size - about $60.00 apiece.
If you are turning bowls with some depth, I would get the largest rougher and finisher and, get the optional Lexan shield. The large are pretty expensive, no matter where you buy them. On the other hand, you never need to spend time sharpening tools and for me that is a big plus.
Use the rougher to get blanks round and for hogging out wood.
The finisher is used for, well, finishing.

I used the low speed range (500 - 1200) rpm for everything turned on this page, including the Mica Pearl and Plastic.

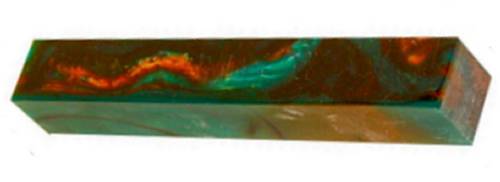
Plastic pen blanks are ideal for turning pens in an apartment - very little dust at all and dust control of any type could be considered optional.
Too bad these kinds of blanks don't grow on trees.
