Added Bonus: Preserving the Tail and Mounting Same
Extra Added Bonus: Softening a Squirrel Tail
Extra-Extra Added Bonus: Fried Squirrel Recipe
Trap Design Change - 06-2015
Further Innovation - 07-2015
This is what's referred to as a 'body trap' and they work really well for trapping tree-rats but they are not as much fun as doing some custom modifications on your own.
Note: Unfortunately this was not an original idea of mine - the inspiration was from several UTube videos dealing with cheap ways to trap squirrels for meat.
As an aside, I also learned that it would be an excellent idea NEVER to get on the bad side of a gal from the back country. That would not be pretty. One could awake in the morning missing a couple vital appendages - creatively.
It occurred to me to add a slightly more professional touch, if you want to call a the addition of a piece of dowel and some stainless steel screws slightly more professional.
A parts list appears at the bottom of this page for easy reference :)
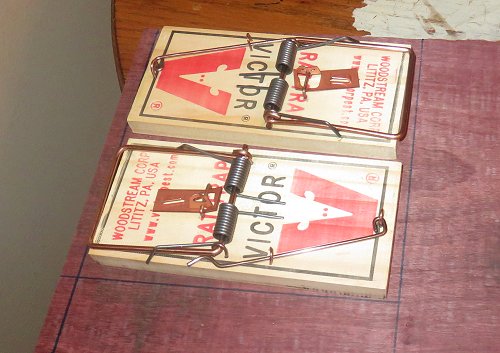
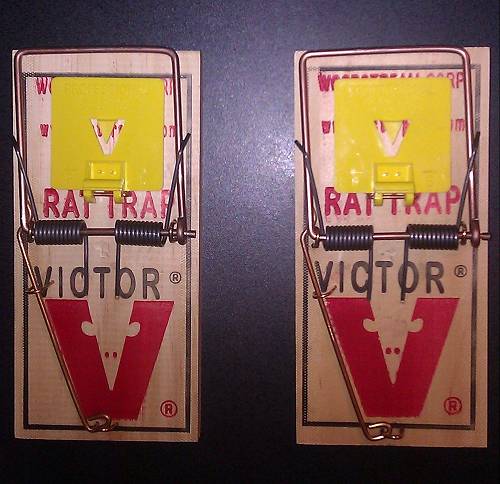 Session 9.
Good old Victor Rat Traps after all these years are still hard to beat and they can be easily modified to kill tree rats......uh.....I mean squirrels.
Without modification, rat traps can still kill squirrels if they trip the trap just right, preferably behind the skull and the odds of a successful kill appear to be somewhere around 40-60%.
We can improve those odds a little.
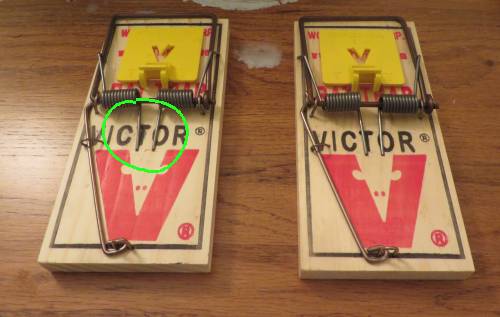
Although quite strong, the spring on these traps may not be enough to take out a large squirrel, or a squirrel caught off- center so to speak, and the first order of business is to beef up the spring tension.
Measure the width of the trap and cut two pieces of dowel 1/4" to 3/8" dowel in size. I find that 1/4" works just fine but if you feel like going for overkill, 3/8" diameter dowels will definitely get you there.

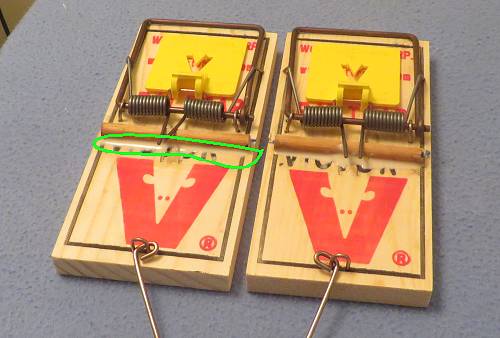
Scribe a line on the base of the trap where the dowel will be inserted and using a sharp knife, notch out a slight Vee
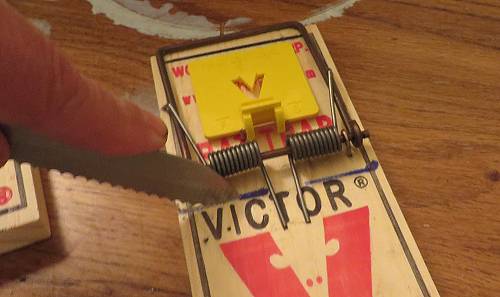
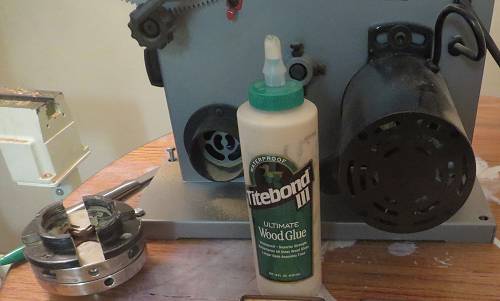
Run a bead of wood glue along the notch - Tite Bond is my favorite wood glue.
The reason for the notch is to provide an anchor for the the wood glue which in turn will anchor the dowel.
Lift the springs and slide the dowel in place
Run another bead of glue along each side of the dowel and let dry. If necessary, a pair of vice grips or other type of clamp can be used to secure the dowel while drying if the spring itself doesn't suffice.
The reason for the dowel is to increase the spring tension, giving the trap a much more forceful snap.
To ensure a high mortality rate, we add just a bit more hardware.
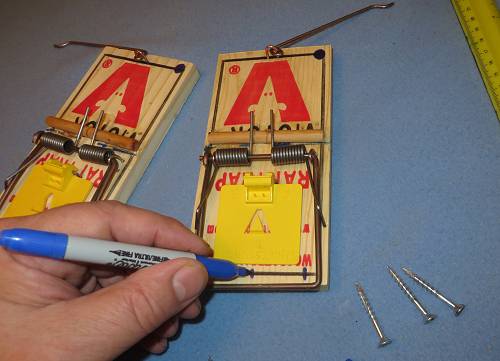
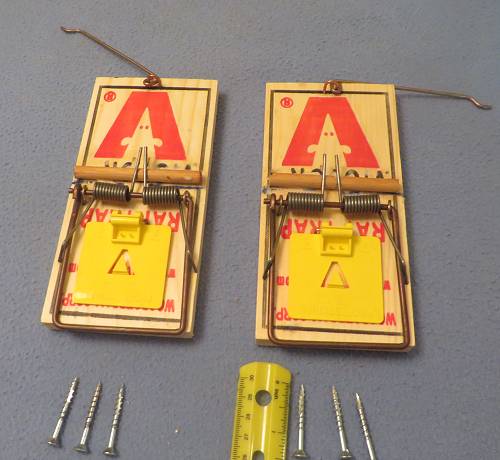
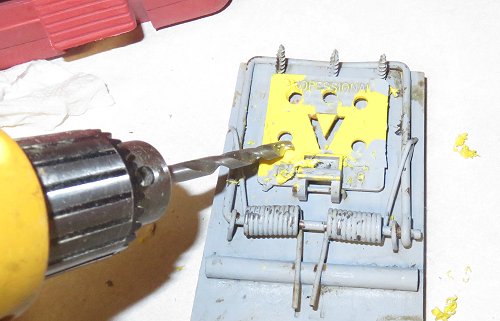
Mark three centers and keep them inside the trap spring. These are for drilling pilot holes.
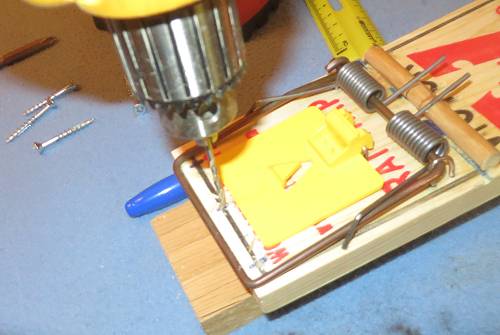
Next, drill three pilot holes and thread in three stainless steel screws. I like the self-tapping type, where the slot also doubles as a blood groove.
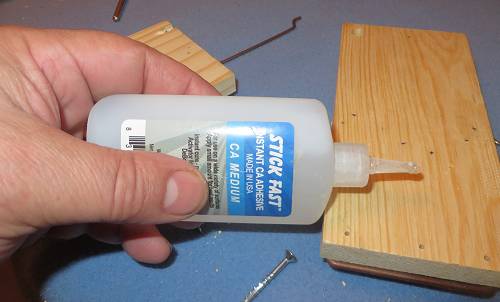
A little CA glue functions the same way as Loc-Tite. Drive the screws in from the back.
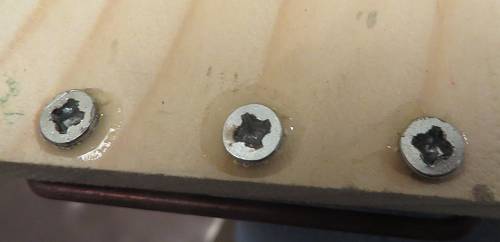
That ought to hold them in there.....
Screws with a low thread count should prove more lethal than nails.
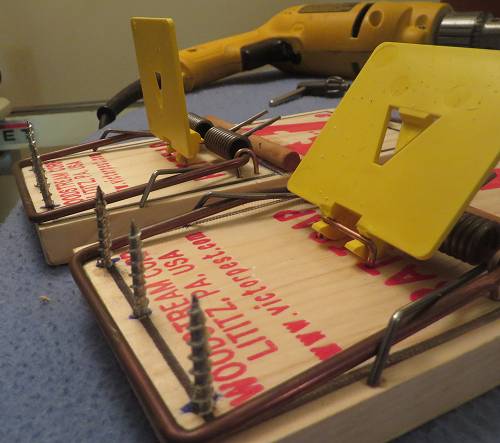
Looking better by the minute!
Test the trap action, ensuring the screws don't interfere with closure of the trap.

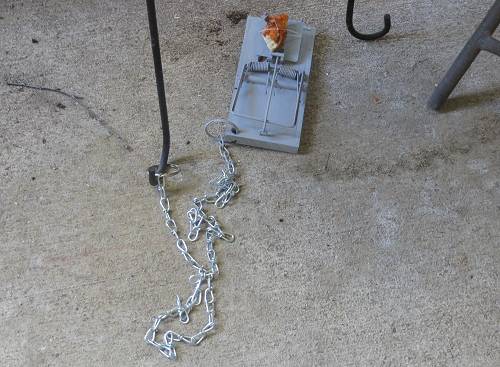
Add the Tree-Rat Anti-Theft Device.
Drill one more hole in the corner of the trap to allow securing of same. - don't want poorly trapped tree-rats running away all with your hard work....
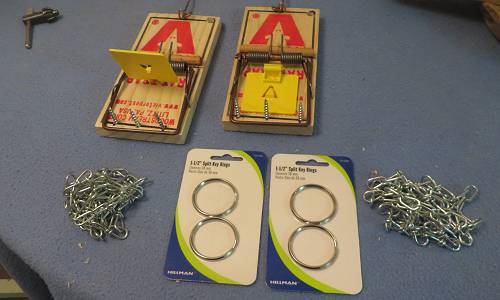
Next, get a couple feet of cheap chain, galvanized or similar.
Pick up a couple sets of key-rings. You can find those at any hardware store where they make keys.
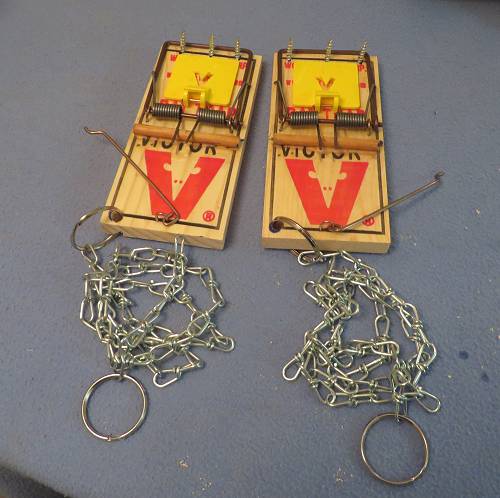
Assemble the anti-theft tool, one ring attached to the trap. Attach the chain.
Attach the second ring to the other end of the chain.
Just about done and looking nice!
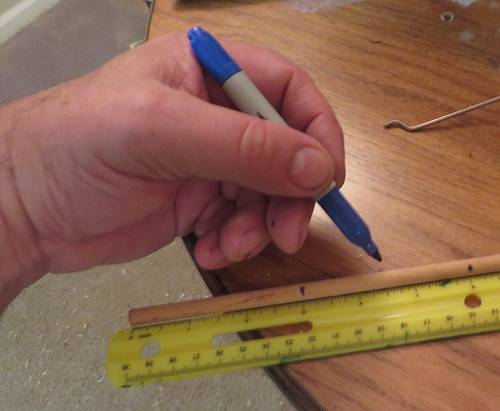
Test the Trap
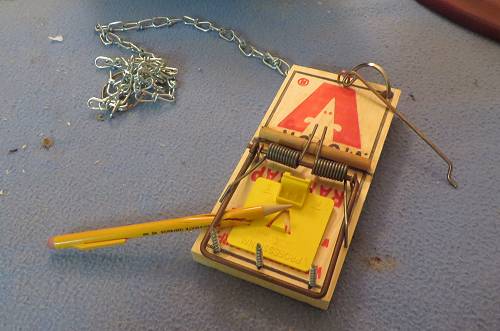
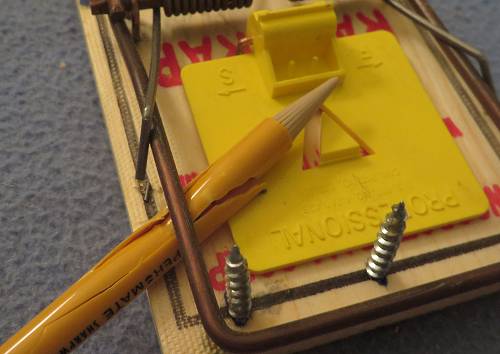
A disposable Bic Pencil was used to test the trap.
In a word, Awesome!
Camouflage
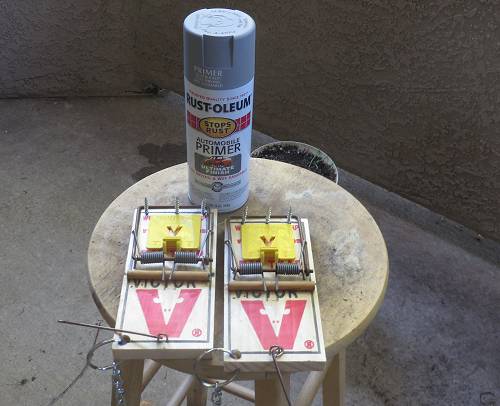
Need a bit of cammo to match the surroundings.
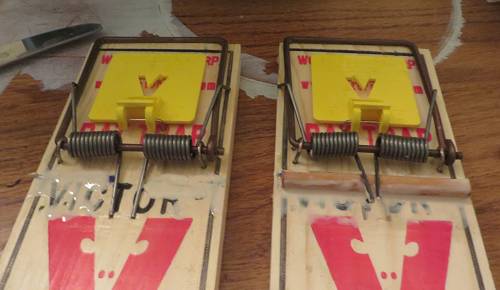
Coat the trap with your favorite spray paint. These are coated with Rustoleum Primer - a favorite of mine.
Leave traps outside for a few days so all the new smells dissipate.
Next, bait the traps without setting them, letting the rats get accustomed to free meals.
Peanut butter, Pizza Bread and Cheese Whiz work really well.
Then, set the trap and hope for the best.
Note: setting the trap next to a wall or something vertical seems to work well.
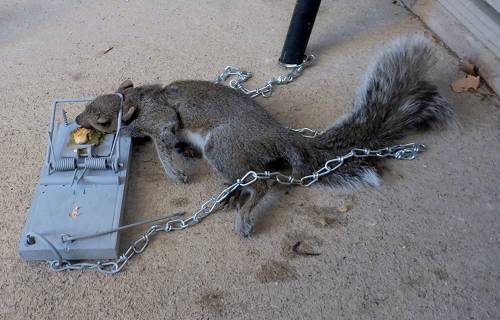
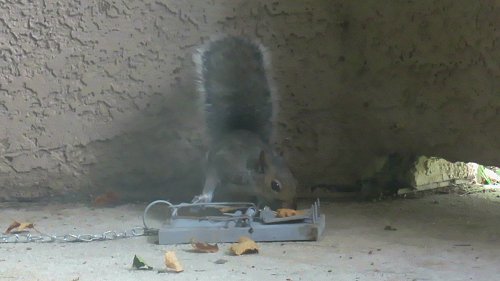
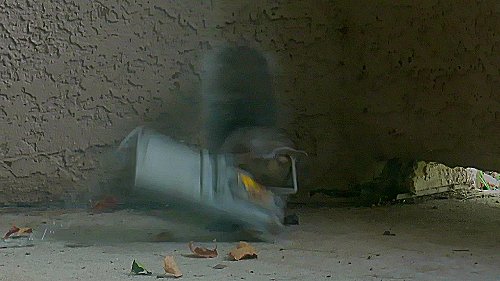
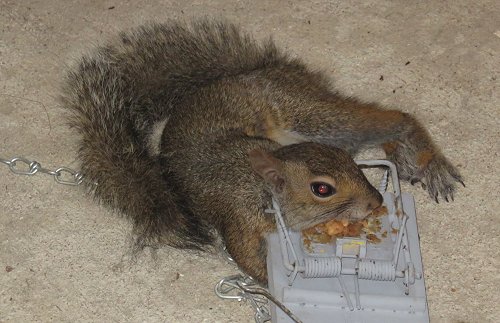
One day later, Success!
One less rat will be molesting my flower pots.
How's that for precision! This Tree-Rat ended up perfectly screwed, so to speak.
Bill of Materials for One (1) Modified Rat Trap:
Standard Victor Rat Trap: (1)
Piece of 1/4 - 3/8" Dowel: (1)
1-1/4 - 1-1/2" Stainless Steel Self Tapping Screws: (3)
1-3' Galvanized Chain
1" - 1-1/4" Key Rings: (2)
Cammo Spray Paint(s): Variable
Wood Glue
LocTite or CA Glue - Optional
Tools Required:
Drill
1/8" Drill Bit or Smaller for Pilot Holes
1/4" Drill Bit for Anti-Theft Chain
Phillips Head Screwdriver or Driver Bit for Drill
Saw for cutting Dowel
Optional:
Nuisance Squirrel(s)
Peanut Butter, Soft Cheese, Pizza Bread and other goodies.
A Desire for Revenge.
Trophy Time
I've been needing a new dangly for my rear-view mirror for a while and I to believe a rat tail will fit the bill.
Tail removal is a very easy thing to do, thanks again to numerous YouTube videos on the subject.
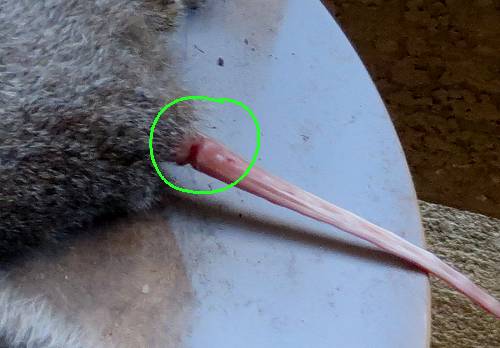
Simply cut through the skin around the base of the tail and gently push the tail skin forward- towards the end of the tail.
The first 1/2" or so can be a bit of a challenge but after that, the tail fur slides right off.
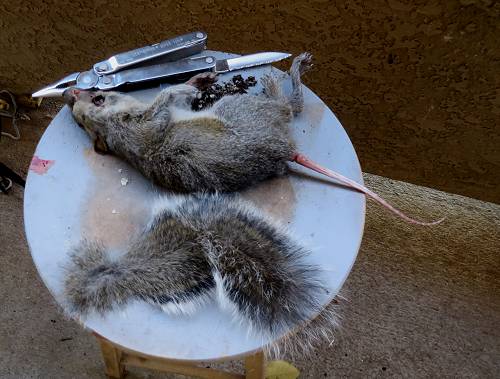
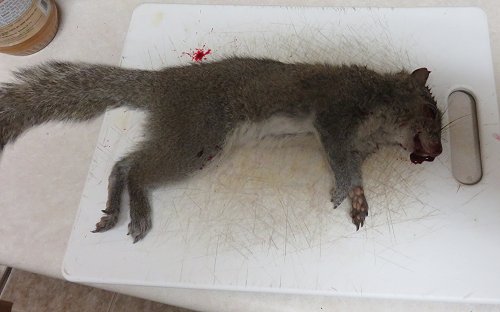
Without the hairy tail, the tree rat looks very much like a common rat. Small wonder.
There seems to be some debate as to whether non-iodized salt is better than iodized, although I don't think it makes much of a difference.
Update

A better way to get more tail and a more even cut can be achieved by using clippers and in this case - a beard and moustache trimmer.
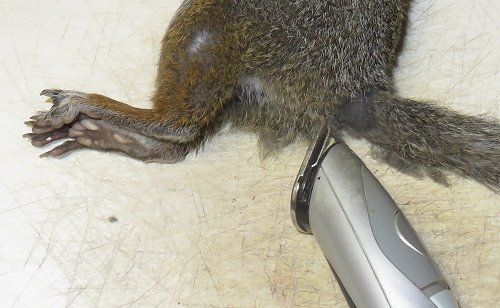
Only takes a minute or so to remove the fur and it makes for a much cleaner tail removal process.
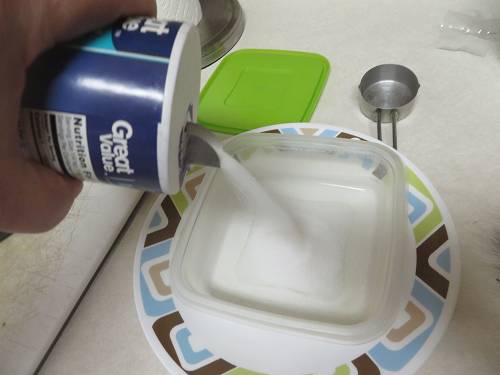
Next, prepare a salt bath - ensure the water is good and salty.
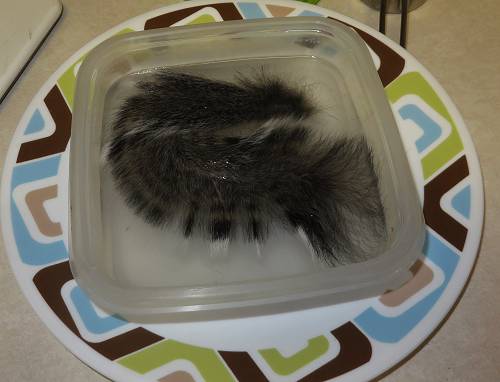
Place the tail in the salt bath and soak for a day or so.
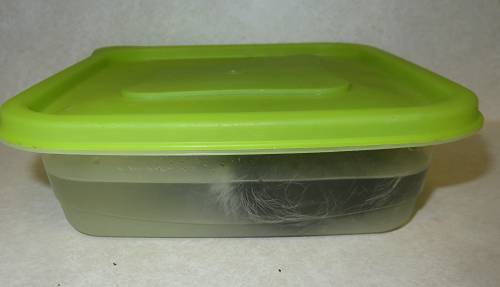
This will kill any critters and allow the brine to work itself into the tail skin.
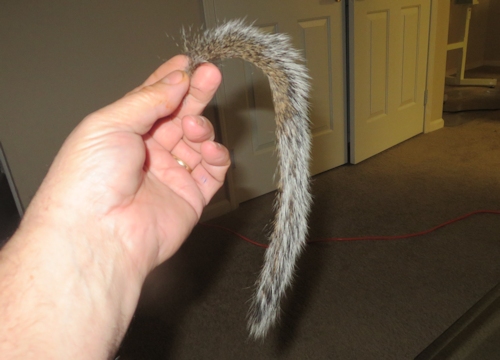
A day later the tail is removed to dry.
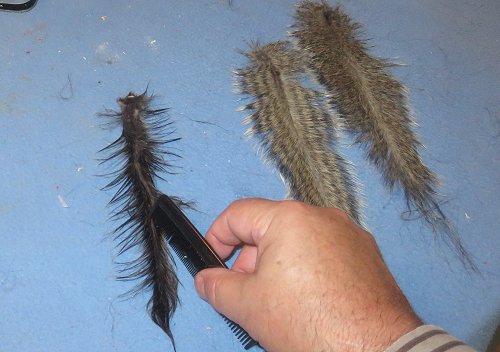
Laying the tail out flat and combing the hairs out makes for a fuller looking tail.
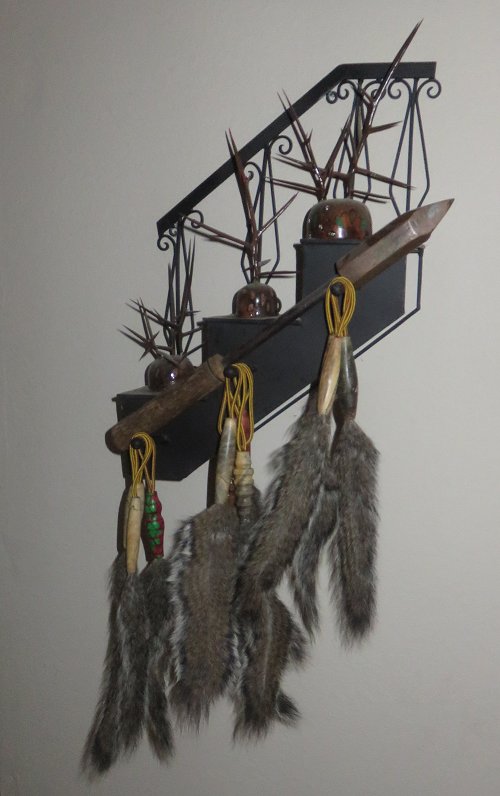
Tail Taxidermy
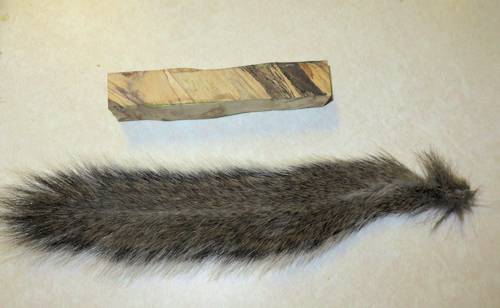
There are any number of ways to display a Tree-Rat tail and for this exercise, I think I will rely on my pen- making
skills, using a piece of spalted hackberry.
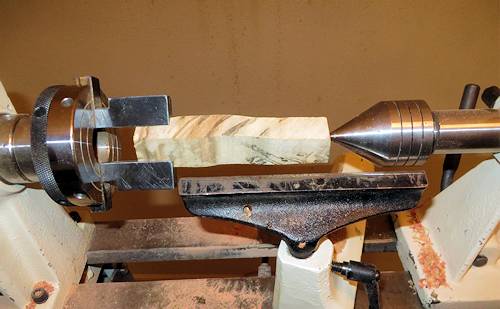
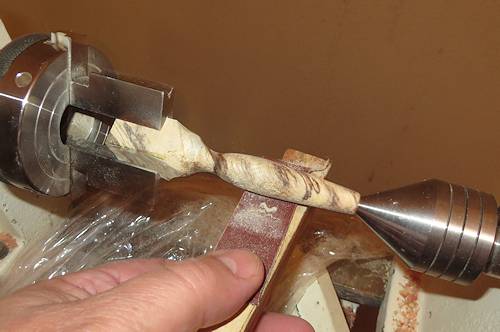
The dedicated pen-chuck is one of the better inventions to come along in recent history and the aim is to get the piece symmetrical.
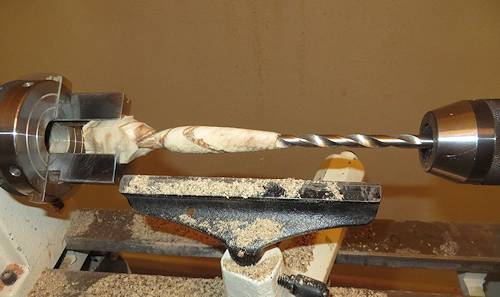
It took about two minutes to get a rough design and without moving the piece, drilling out one end for the squirrel tail holder.
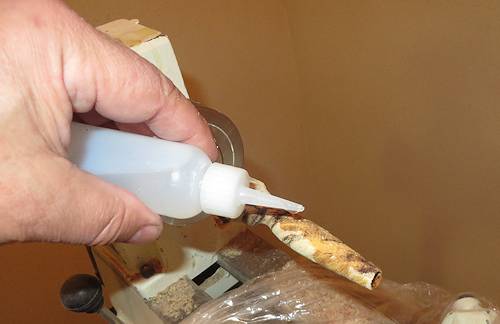
This piece of hackberry is quite pithy so the entire piece is being coated with thin CA glue, which is soaking in as a sponge would absorb water.
With materials of irregular density, sand using a backing board. If you don't, you can very easily end up with an oval piece of wood.
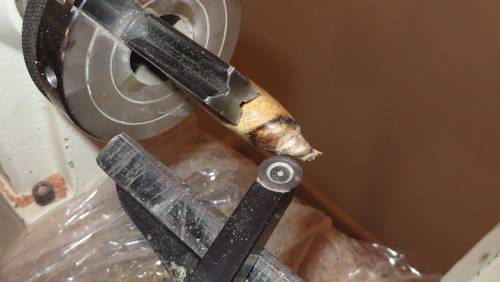
The rat-tail holder has been flipped around and the other end is drilled out to 5/16" for the in this case, a piece of shoe lace.
I think this cheapo Walmart knock-off will work well with the overall motif.
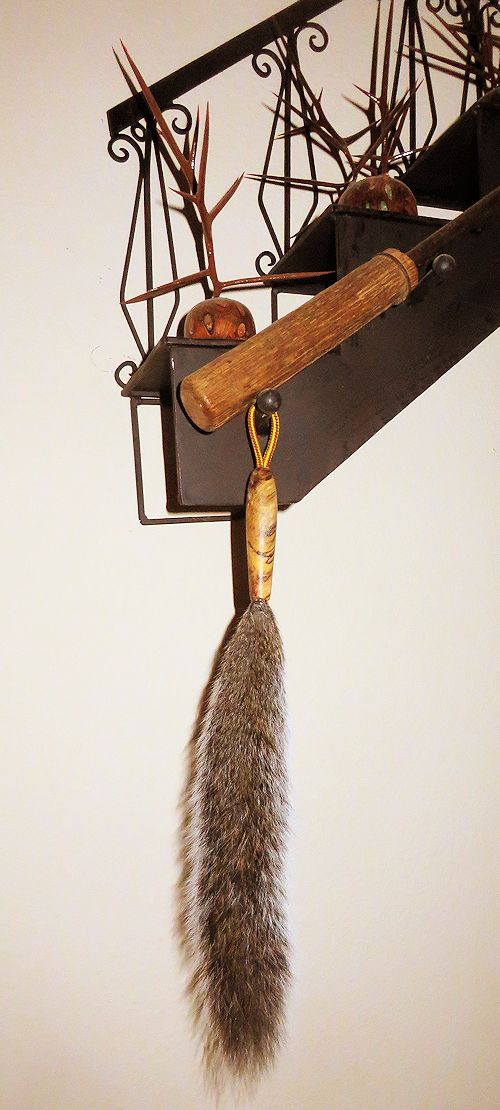
Not bad at all. Two more to go to finish the wall ornament and then it's time for the rear view mirror dangly.
Note: if you have something creative that you would like to add to the world of tail preservation, feel free - provided of course that it is in reasonably good taste...
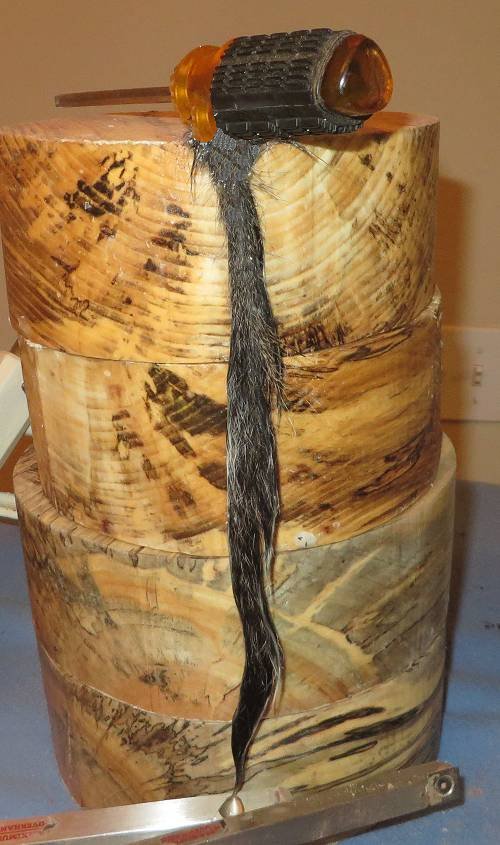
Steps to Keeping a Squirrel Tail Soft and Pliable
1. Place Squirrel Tail in a salt bath for several days.
2. Remove tail, hang and let the hair dry, brushing out any dried salt.
3. Check the skin every day or so for signs of drying - getting stiff.
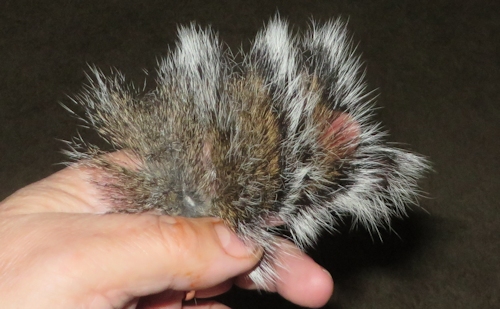
When the skin starts to stiffen, pull the tail over an edge 5 times or so, front and back a couple times a day.
Pull the tail from the base to the tip, with the fur.
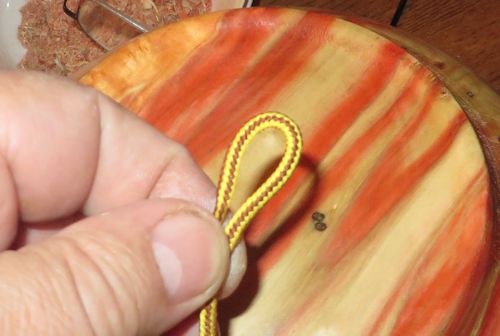
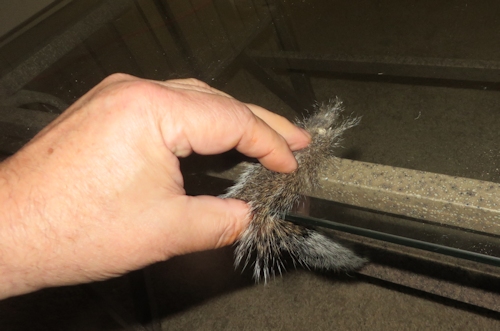
About a week later, the tail skin is soft and pliable:
It wraps easily around my finger......
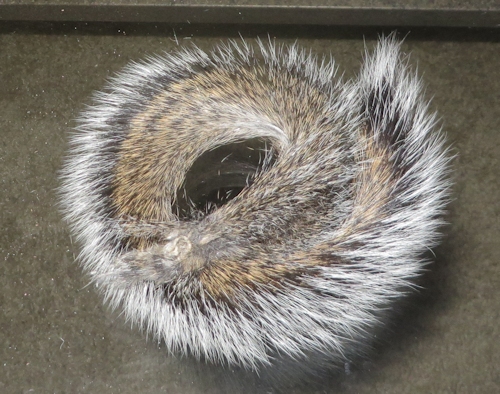
And looks quite nice indeed.
Note: If you are interested in a nice, soft, pliable tail, don't load the tail cavity up with salt and/or boraz like many sites suggest. Simply soak the tail in a salt bath for several days and then let dry naturally. Drying compounds jammed into the tail cavity make it really difficult to obtain a flexible tail like the one pictured above.
Dinner Time!
Waste not, want not as they say, so here is a very basic recipe for fried squirrel:
Main ingredient: Squirrel. Figure on one squirrel per person.
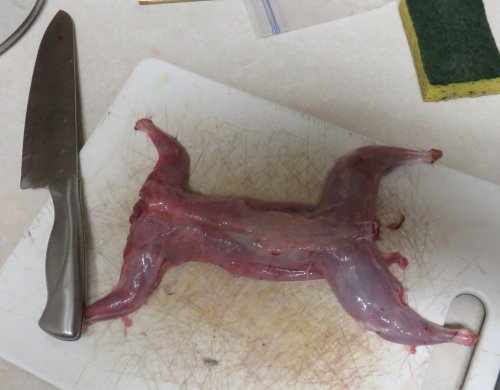
Dress out Squirrel.
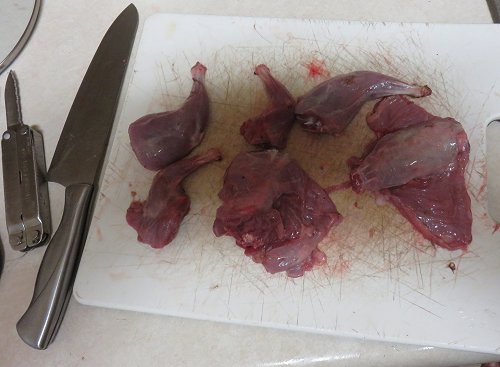
Cut up into five or six pieces. Might as well cut out the rib cage as well - not much meat there.
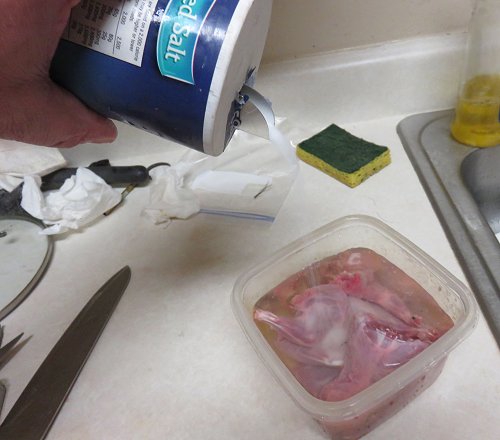
Young squirrels are quite tender while older ones can be rather tough. Soaking the pieces overnight in a salt water bath works as a decent tenderizer. Salt baths also work well for getting the gamy taste out of the meat for other types of game.
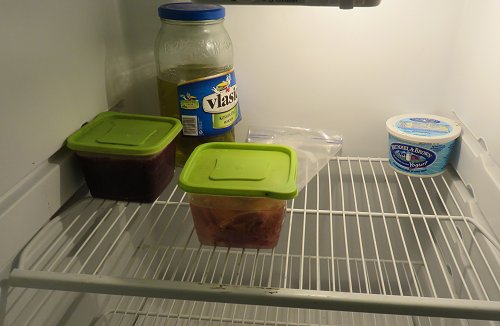
Oh, and don't forget to do the soaking in the fridge, not on the counter.
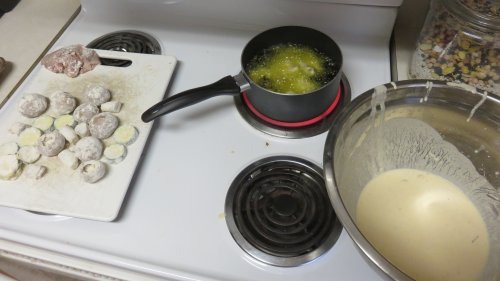
Day 2:
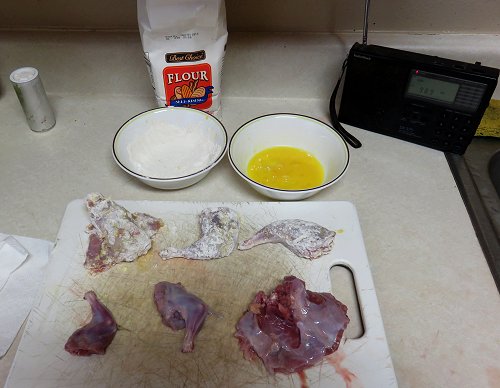
Remove squirrel pieces from the brine solution and pat dry. Let the pieces come up to room temperature, dip in egg and coat with flour and your choice of spices.
Note: Mushroom batter and other similar mixes work as well. Fish batter works well too.
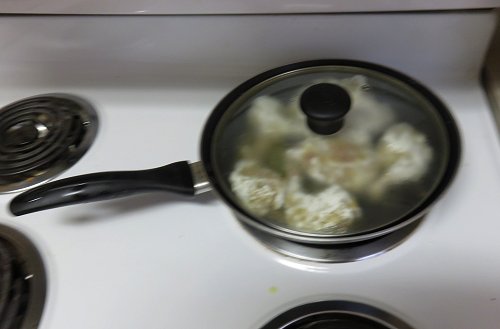
Heat up a pan with a couple tablespoons of ail oil or so and fry until light brown.
Remove from oil and pat dry.
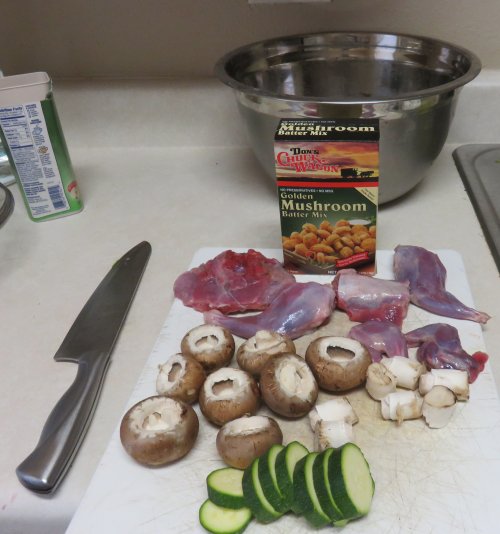
Chop up some veggies for the meal and use a favorite batter.
Dip the now cooled-down squirrel pieces in batter and re-fry. Do the same for the squash and mushrooms.
Then:
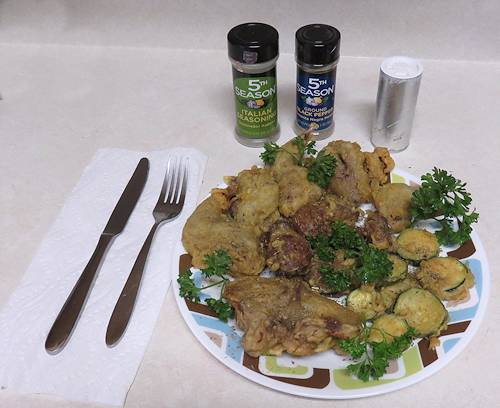
Enjoy! - Fried Squirrel with Mushrooms and Zucchini.
Trap Design Modification - 06-2015
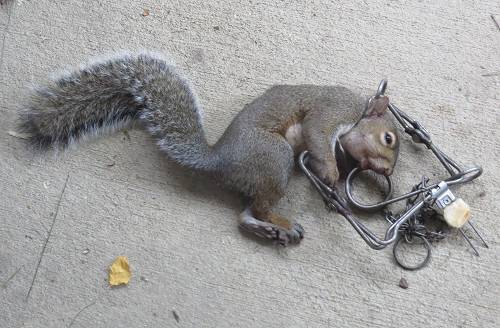
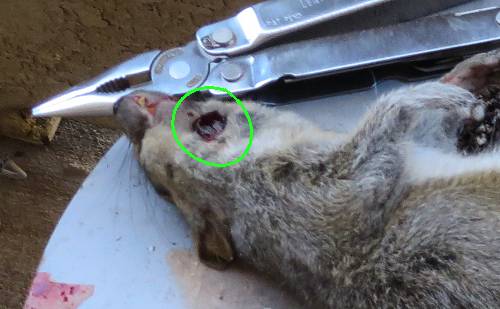
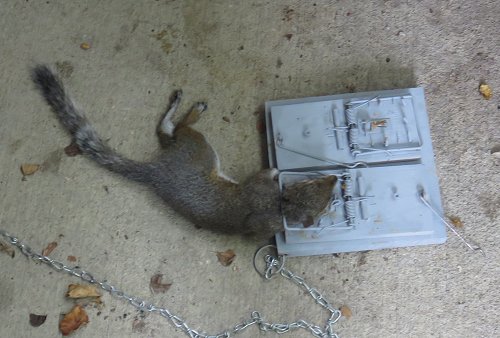
Lately I've been noticing a flaw in the original modifications and that happens when dinner approaches from the side of the trap.
In this case, dinner set off the trap but managed to avoid screws in front of the trap and tried to pull out of it, and did succeed but did not get very far. A large squirrel can pull out of a rat trap if it is not caught behind the base of the skull.
Since the traps have been snapped without anything in them about 20% of the time, a temporary fix is called for whilst I ponder a better way to do this.......and I have a thought or two on that as well....
In the interim:

The first thing I'm going to do is modify the bait tray. By far the best bait has been chunky peanut butter and the problem lies in the fact that it needs to stick better to the bait tray.
I think drilling a series of 1/4" holes will help. The holes will lighten the tray and allow me to get peanut butter and chunks into the holes, making it tougher to get everything without exerting a bit more pressure.
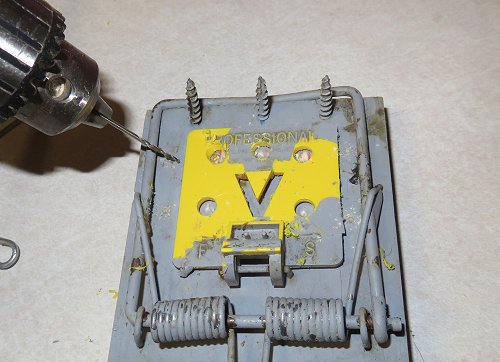
Lastly, I'm going to drill three 1/16" holes on both open sides of the trap.
These holes are angled in slightly and the nails are what I would call 'Hobby' nails, used for hanging pictures or for smaller wood projects. If a squirrel gets hooked on one of those nails, it ought to act kind of like a fish hook.
I cannot use my favorite screws because the clearance looks iffy as it is. For later iterations of this, clearance and trap weight are going to be addressed as well
All that's left now, is a new coat of paint and a little curing time. I like Rustoleum automobile primer because it blends in well with concrete.
Yup, that worked pretty well.
Of course, if I was really all that concerned about rats escaping traps, body traps are the way to go.
However, the other is a lot more fun!
07-2015 - The 95/5 Solution
Meaning, 95% of the Population Gripes about any given subject and 5% of the Population Does something about it.
Based on hours of intense observation as to how some tree-rats escape the their fate as rat-kabobs, there are two main reasons for this.
Reason 1: Rat traps are a bit too light in weight to handle the larger tree squirrels if they are not caught in an ideal position, as in screw through the skull or the trap snapping the neck. Caught off-center, they can often pull out.
Reason 2: Larger squirrels squarely screwed, can sometimes pull themselves off the trap so a slight modification needs to be made there as well.
Since my original traps are pretty well trashed out, might as well put some of these ideas to work using some new hardware.
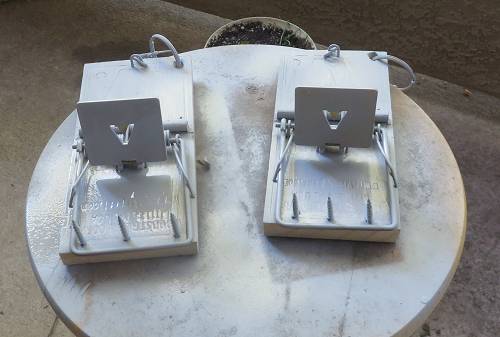
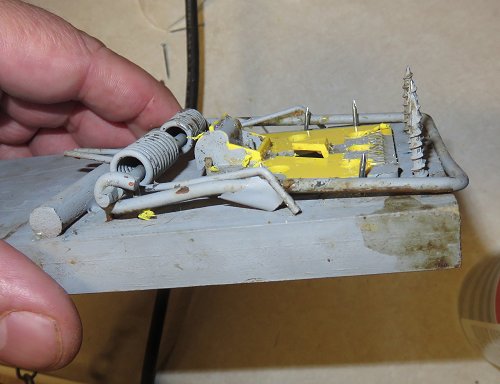
The first item of business is to add some weight to the trap and for this I am using some Purple Heart, which is a dense, oily wood and I am going to attach two traps to one piece of wood.
This time around I am going back to the copper bait tray. The yellow plastic trays had a habit of breaking after so many uses.
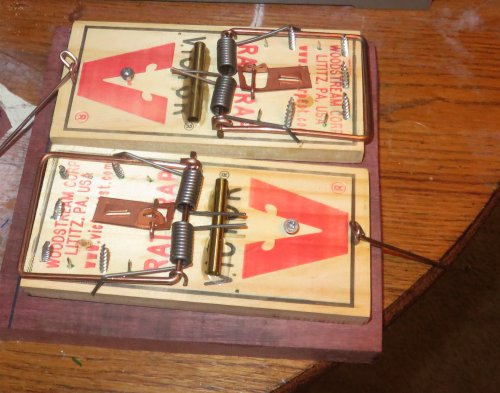
The traps are screwed onto the Purple Heart. New overall weight is now somewhere around two pounds.
In lieu of using dowels to beef up the spring tension, a 7mm copper tube looks to do just fine.
An additional screw has been added to each side and now all are pointing into the center of the trap, rather than straight up.
This way should a rat get caught in a less than ideal position, the first thing the rat does is pull violently backwards and now when that happens, said rat should hook itself up further, thus making escape much more difficult. That in conjunction with the extra weight should considerably up the odds of a successful trapping experience.
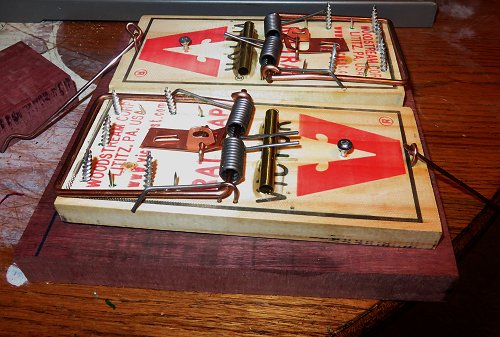
Yup, this ought to work a bit better.
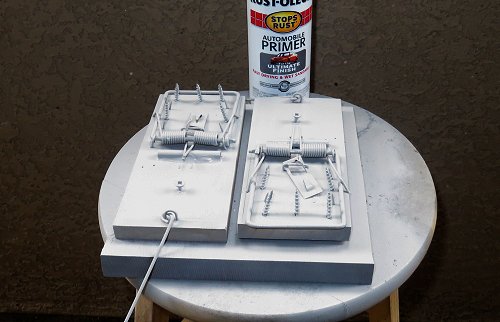
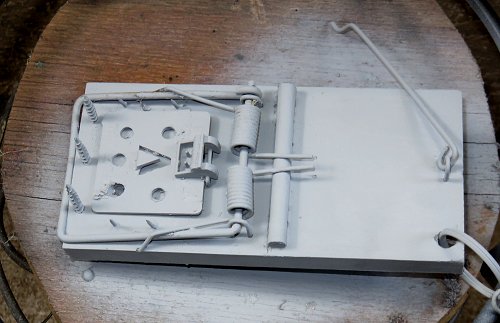
A coat of Rustoleum Auto primer and this looks good to go!
One Month Later.........
Setting both traps can be rather tricky and if one trap is tripped, they both trip. What works really well is to leave on trap not set but baited, and the other one set.....giving the rats a measure of confidence if they feed off the unset one first. Safer on the fingers as well.
However, I have come to the conclusion that body traps are the way to go but playing around with rat traps was much more fun!